|
|
Post by 58chevy on Apr 3, 2021 15:55:23 GMT -8
The blue/pink insulating styrofoam that Paul K mentioned works great. It's easy to pin into and the density is high enough that the pins don't move. It cuts easily with an Xacto knife. No need for a heavy mat cutter. You can make more precise cuts with the Xacto, and you won't have little pieces of styrofoam all over the place. The only disadvantage is that it comes in 4 X 8-foot sheets that have to be trimmed down in order for them to fit into a car.
|
|
|
|
|
|
Post by exoticimports on Apr 3, 2021 16:00:42 GMT -8
Adam I can’t believe that cheap styrofoam like that holds a pin size 0 unless it’s pushed way in?
Paul, that stuff is only about 1.3cm thick. Isn’t the Lep too low on the pin?
|
|
|
|
Post by Paul K on Apr 3, 2021 16:02:50 GMT -8
The blue/pink insulating styrofoam that Paul K mentioned works great. It's easy to pin into and the density is high enough that the pins don't move. It cuts easily with an Xacto knife. No need for a heavy mat cutter. You can make more precise cuts with the Xacto, and you won't have little pieces of styrofoam all over the place. The only disadvantage is that it comes in 4 X 8-foot sheets that have to be trimmed down in order for them to fit into a car. I will add that the surface is very smooth and mold don’t grow on these in oppose to wooden spreading boards where Psocids like to roam. |
|
|
|
Post by kevinkk on Apr 3, 2021 16:17:17 GMT -8
Interesting as always.
The fridge method works, I've used it for a couple of my Ornithoptera, and while it takes a bit longer than 24 hours, more like 8 days
for a female, the specimens are relatively dry, but relaxed, and I don't worry about mold as much, although I do use a disinfectant.
Spreading boards? seems like everyone ha a favorite. I just started using a slight angle board, that I had to customize to get the width
I needed, but still use my styrofoam boards as well.
|
|
|
|
Post by Paul K on Apr 3, 2021 16:31:45 GMT -8
Adam I can’t believe that cheap styrofoam like that holds a pin size 0 unless it’s pushed way in? Paul, that stuff is only about 1.3cm thick. Isn’t the Lep too low on the pin? Yes, I just check and you’re right they are ( blue one)1.3cm but two attached together make it 27mm, the pin is up about 12mm above the surface which is perfectly enough for me. Pink foam is thicker about 15mm so it is about 30mm if you prefer to mount specimens higher on the pin. You could also use pink for a bottom and blue for the top as I found out that 15mm grove is a bit to deep and the pin doesn’t stick deep enough into the bottom and the specimen sometime is moving when pushing forewings up. BTW the foam is less than $10 a sheet and if I remember I made somewhere around 50 of them with different sizes. It takes also about two hours to cut strips to size and glue them together. Very cheap and effective. |
|
|
|
Post by livingplanet3 on Apr 3, 2021 18:57:40 GMT -8
Many thanks to all for the prompt responses! I'll read through all of them, and get back to you with any further questions.
|
|
|
|
|
|
Post by exoticimports on Apr 4, 2021 4:22:51 GMT -8
Mine are balsa, but the center cut is too short so I have to push every specimen up the pin after it is dry. This results in about 20% spinners.
I have the pink foam on hand I’m going to give that a try. Thanks!
Chuck
|
|
|
|
Post by joachim on Apr 4, 2021 5:12:48 GMT -8
I also have some boards created by mysel useing foam. Here 1 m2 is aabout 75 EUR cent. I also have some made from wood. a friend of mine is now making boards himself and I hope he will give me some for a good price. What I did not understand what the advantage is what she described. Joachim The advantage of her system is to rub scales with her fingers and take a chance to break specimen trying to push it off the pin 😜 Haha Paul, good humor as always. Maybe some of you know of ALF, the alien in an american movie. He said, if we don't understand something, we break it . Surely most of the specimen she will not break or in a box, the side with scales off will not be visible, anyway, not necessary. |
|
|
|
Post by livingplanet3 on Apr 4, 2021 8:44:24 GMT -8
Don't mount upside down in you're just starting. Chances are when you turn the specimen over the wings will be wrong. The key to the correct mounting of dried specimens is that they are properly relaxed otherwise you are going to make a mess. Don't attempt to spread unless you have easy movement of all 4 wings. There are plenty of videos showing how to do it properly. And, do a search. Various methods, techniques and tricks have been discussed on this forum. Chuck I make my own foam spreading boards. First I cut 1 inch foam to the width and length I want to make the board. Then I cut 2 strips of 1/2 inch foam to the same length but the amount less than the width of the base that I want the groove to be. I then use white latex glue to stick the 1/2 inch strips onto the 1 inch strip with the outer edges of the 2 layers level. That leaves the groove that I require in the middle. By varying the width of the base and upper foam strips I can make both different size boards and boards with different width of groove in the middle. It's really simple, as long as you decide what sizes you want and you are careful about cutting the pieces to the correct size. I do not cover the foam with anything, but it may be a good idea to sand it down if the surface is not smooth. Personally I make all my boards about 2 feet long as it's a great length to work on, because foam is so light it doesn't need to be flat on the table while I am spreading specimens. These boards last for years! I just took a photo of one so you can see what I mean: livingplanet3 said "I will definitely start out with some less valuable specimens - probably some Papilionidae that I collected locally." I strongly recommend you start with specimens like these for practice before trying to spread any valuable specimens. It might be a good idea to first try it out with some freshly killed specimens that are still soft, learn how to spread them successfully and after that try relaxing some dried specimens of the same to get the hang of relaxing techniques. Once you are happy that you understand how to do it then start spreading your rarer material. You will find that you have to learn what to do with your hands as you spread the specimens. One other tip - I put larger pins each side of the thorax next to the head and immediately below the joint of the hindwings with the thorax so that when I move the wings into position the body does not move with them. Once the wings are all pinned into position I remove these pins before cross pinning the antennae and under the abdomen so it doesn't droop after spreading. Adam. I also have some boards created by mysel useing foam. Here 1 m2 is aabout 75 EUR cent. I also have some made from wood. a friend of mine is now making boards himself and I hope he will give me some for a good price. What I did not understand what the advantage is what she described. Joachim The advantage of her system is to rub scales with her fingers and take a chance to break specimen trying to push it off the pin 😜 The blue/pink insulating styrofoam that Paul K mentioned works great. It's easy to pin into and the density is high enough that the pins don't move. It cuts easily with an Xacto knife. No need for a heavy mat cutter. You can make more precise cuts with the Xacto, and you won't have little pieces of styrofoam all over the place. The only disadvantage is that it comes in 4 X 8-foot sheets that have to be trimmed down in order for them to fit into a car. 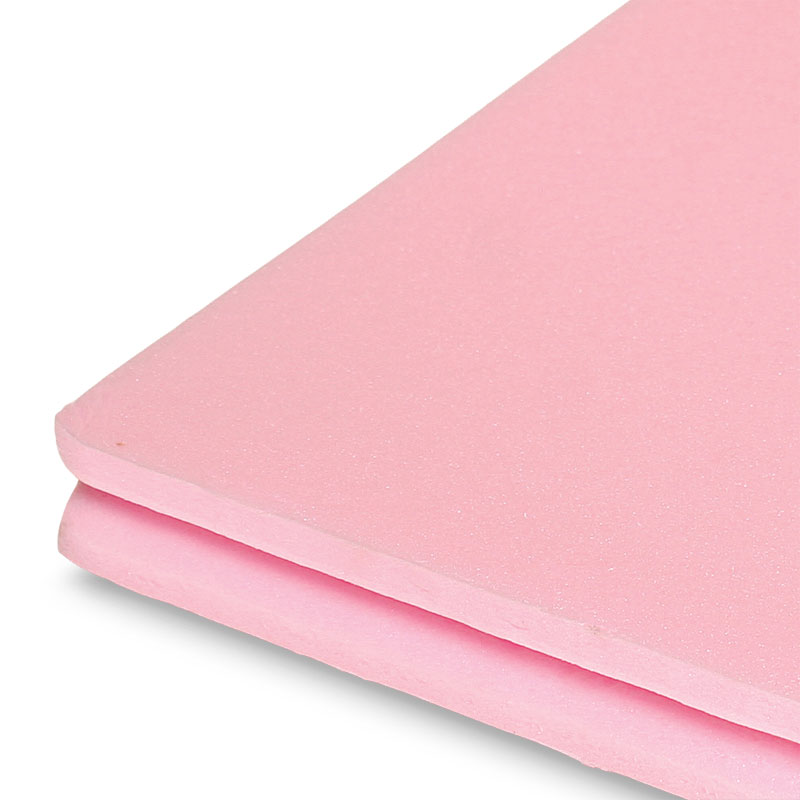 Yes - I've seen this in my local hardware store, and imagine that it would indeed be good for making spreading boards. Yes - I've seen this in my local hardware store, and imagine that it would indeed be good for making spreading boards.Interesting as always. The fridge method works, I've used it for a couple of my Ornithoptera, and while it takes a bit longer than 24 hours, more like 8 days for a female, the specimens are relatively dry, but relaxed, and I don't worry about mold as much, although I do use a disinfectant. Spreading boards? seems like everyone ha a favorite. I just started using a slight angle board, that I had to customize to get the width I needed, but still use my styrofoam boards as well. Adam I can’t believe that cheap styrofoam like that holds a pin size 0 unless it’s pushed way in? Paul, that stuff is only about 1.3cm thick. Isn’t the Lep too low on the pin? Yes, I just check and you’re right they are ( blue one)1.3cm but two attached together make it 27mm, the pin is up about 12mm above the surface which is perfectly enough for me. Pink foam is thicker about 15mm so it is about 30mm if you prefer to mount specimens higher on the pin. You could also use pink for a bottom and blue for the top as I found out that 15mm grove is a bit to deep and the pin doesn’t stick deep enough into the bottom and the specimen sometime is moving when pushing forewings up. BTW the foam is less than $10 a sheet and if I remember I made somewhere around 50 of them with different sizes. It takes also about two hours to cut strips to size and glue them together. Very cheap and effective.
I recently obtained a stack of foam board scraps (1/2" thick) from an artist; many of them measure at least 14 X 14", and I assume that I could make a few good spreading boards from them? - 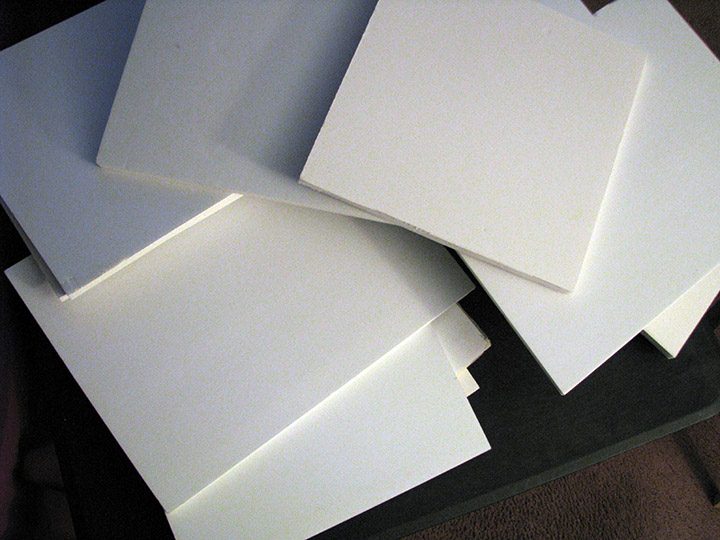 Then again, these scraps aren't very large, and perhaps it would be better to just buy a full sheet or two of the insulating foam from a hardware store, and make a series of longer (as Adam Cotton mentioned, 24") boards from those, with variable width / depth grooves? Then again, these scraps aren't very large, and perhaps it would be better to just buy a full sheet or two of the insulating foam from a hardware store, and make a series of longer (as Adam Cotton mentioned, 24") boards from those, with variable width / depth grooves? |
|
|
|
Post by kevinkk on Apr 4, 2021 10:10:28 GMT -8
I use the Oxine at 100% and I use a dropper to dribble maybe a 1/4 teaspoon onto the paper towels at the bottom. I leave the butterflies in the glassine as well,
depending on the ink used for data, it may or may not run.
8 days, I just set a O.goliath procus female last night and it went well, I wish I'd known about this method earlier, but better late than never.
I checked her a couple times over the week, it may have been relaxed a day earlier, but it still takes a little time, the O. croesus toeantei male
took 7 days, and set easily.
I think my moisture level is sufficient, I use distilled water and give the paper towels below and on top of the specimen a good mist, and the lid
of the container forms condensation quickly.
Spade tip forceps- also changed my method completely, before I'd used a teasing needle, and it was fine with freshly dispatched, but relaxed
specimens were a problem. Until I watched a video, I'd have never believed you could clamp onto a wing without damaging it.
I'm not sure about other disinfectants, I've got the Oxine for another purpose, for disease control in larva, and being safe for animals,
it seemed the thing to use, I've got a gallon of it, and when we were having shortages of disinfectants last year, I felt pretty good about
having that gallon of disinfectant under the sink.
|
|
|
|
Post by livingplanet3 on Apr 4, 2021 13:57:34 GMT -8
I use the Oxine at 100% and I use a dropper to dribble maybe a 1/4 teaspoon onto the paper towels at the bottom. I leave the butterflies in the glassine as well, depending on the ink used for data, it may or may not run. 8 days, I just set a O.goliath procus female last night and it went well, I wish I'd known about this method earlier, but better late than never. I checked her a couple times over the week, it may have been relaxed a day earlier, but it still takes a little time, the O. croesus toeantei male took 7 days, and set easily. I think my moisture level is sufficient, I use distilled water and give the paper towels below and on top of the specimen a good mist, and the lid of the container forms condensation quickly. Spade tip forceps- also changed my method completely, before I'd used a teasing needle, and it was fine with freshly dispatched, but relaxed specimens were a problem. Until I watched a video, I'd have never believed you could clamp onto a wing without damaging it. I'm not sure about other disinfectants, I've got the Oxine for another purpose, for disease control in larva, and being safe for animals, it seemed the thing to use, I've got a gallon of it, and when we were having shortages of disinfectants last year, I felt pretty good about having that gallon of disinfectant under the sink. Many thanks for the above details. Not sure if I can find Oxine locally - might have to order it. Or, use some alternative disinfectant to prevent mold while hydrating specimens. If you've found Oxine to be safe and effective though, I'm inclined to use that, rather than experiment with something else. No water staining issues on any of your specimens' wings using the refrigerator relaxation method, then? Spade-tip forceps - due to the smoothness of the metal, it seems that gripping wings with a specialty instrument such as this is actually less likely to dislodge scales than other means. I suppose you do need to be a bit careful about how much pressure you exert when gripping with the forceps, though. I've never tried using a needle to move wings; I've seen it in videos, but how can it be done without causing punctures? |
|
|
|
Post by exoticimports on Apr 4, 2021 18:13:34 GMT -8
Just use a splash of rubbing alcohol. It’s cheap and safe.
|
|
|
|
Post by kevinkk on Apr 4, 2021 20:30:47 GMT -8
No staining issues with the specimens I've relaxed. What I found out from using my former warm and humid method, as opposed to the cold method, was the warmth would cause the wings to be damp, and I was worried about water stains, however, the cold method has eliminated this wetting of the wings while at the same time relaxing the specimen enough to set it properly. Some condensation did form on the wings in small droplets, but nothing like the wetting I was seeing using the warm relaxing chamber. The wings at most become no wetter than if they were lightly misted, very lightly. I had a mold problem with one specimen using the warm box, but nothing using the cold box, I would guess any disinfectant in a closed box is going to prevent mold, and it's less likely to develop in the cold. That specimen did have some tissue wrapped around the body, and that may have contributed to the mold. Until wollastoni posted the refrigeration method, I was having second thoughts about what I was trying to do, besides the cost of any one specimen, ruining anything is, for lack of a better term, just sad. I poked a few holes over the years. The teasing needle has a place in the tool box, but for moving wings, the forceps are better. Like I'd mentioned earlier, the needle worked okay for fresh material, as long as the costa was hardened. |
|
|
|
Post by Adam Cotton on Apr 5, 2021 0:22:00 GMT -8
I didn't post the refrigeration method so I edited the last post accordingly.
With regard to using a needle to move the wings, I modified my setting needles so they are less likely to damage the wings and easier to use.
I bent the tip and filed it down so that it is blunt. This enables it to catch the inner edge of the forewing costa without puncturing it. When removing the needle from under the wing after moving it into place it is important to twist the needle a little so the tip is not pointing upwards towards the wing.
Adam.
|
|
|
|
Post by bobw on Apr 5, 2021 3:46:08 GMT -8
There are a vast array of chemicals that are effective at preventing mould forming. Anything containing phenol is good, personally I use TCP.
|
|


